ETA (02/07): Soon after I posted this, I went back to making more cards and then it hit me. I knew exactly what the card with the “Dawn” image needed! I remade the card and am so pleased with the final results. It was hard waiting for the sun to come up so I could take a photo and share. I was a little embarrassed with the first one but I think I made up for it. Maybe? Please see below for the updated card.
Papertrey Ink is celebrating its 6th Year Anniversary this month! Yay! It’s an extra special month because along with the usual product releases being introduced there will be special announcements, contests and challenges, and prizes every single day during the release! They definitely know how to celebrate! :)
Today, the 2013 PTI Stamp Designers were introduced and they each contributed an image to a FREE printable (go here to get it):
Aren’t the images just awesome?! The challenge for today is to create a project using one of the images above. The prize? A personalized stamp set! There is a return address stamp and a custom “handmade by” stamp and each will be customized with your personal details. How COOL is that?
For this challenge, I made two cards. One with the image designed by Heather Nichols and the other with the image designed by Dawn Mcvey.
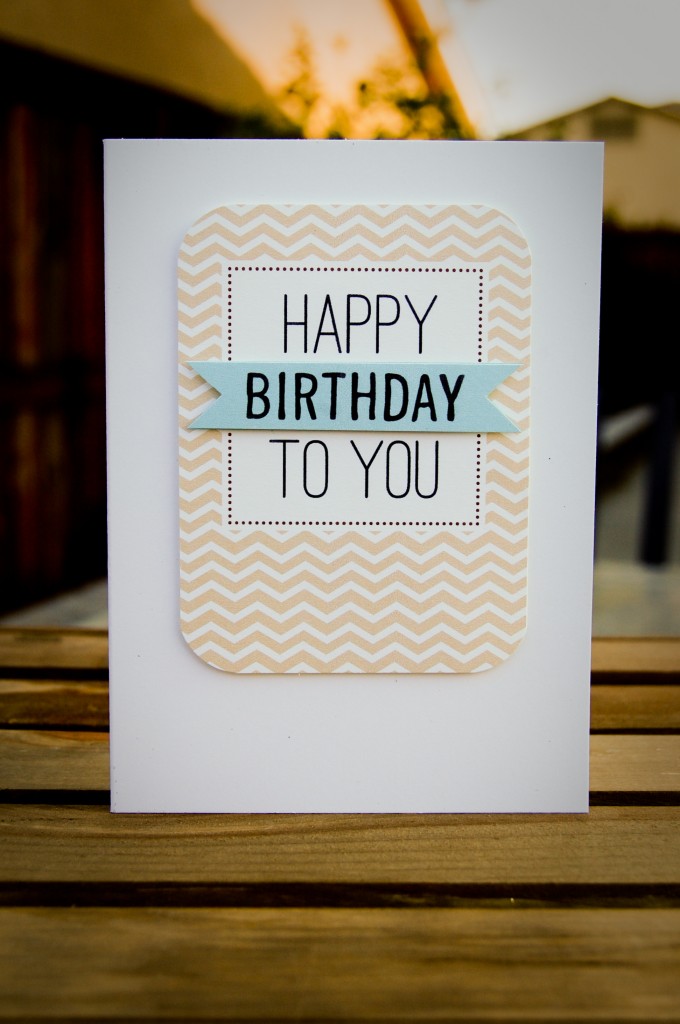
I totally love this image that Heather designed. After I printed it and cut it out I decided to make another print and just cut the banner out and pop it up with foam tape. When I laid it on top of my card base (4″ x 5.5″) I just loved it the way it was. Everything I kept trying to add to it I felt took too much away from the focal image. She designed such a complete image for us to use! I feel like I cheated though…it was too simple a card to make. Thanks for the image, Heather! :)
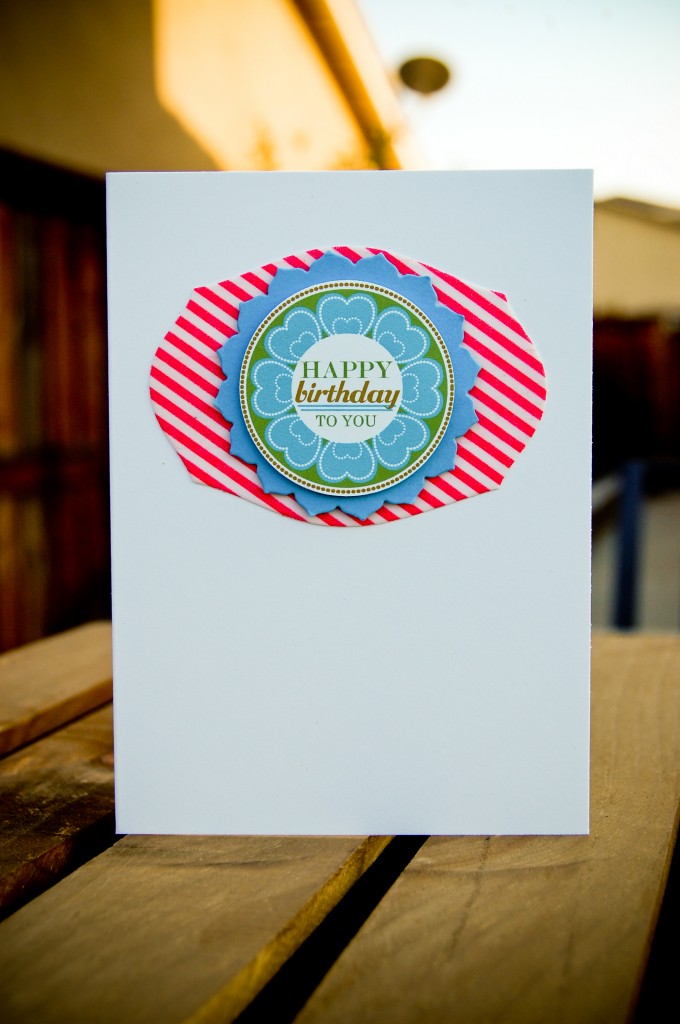
This is such a happy image that Dawn designed. It’s SO Dawn. ;) The only thing that I felt was missing was pink! To me, that’s one of her “signatures” so I had to incorporate it into my card! She’s also the one who made me aware of that awesome washi tape at Target, so I felt using it on a Mat Stack die cut was fitting. I just wish I were happier about the outcome of this card. It feels like it’s missing something but I can’t quite figure it out yet. If I had a day or so to let it “sit” maybe it would come to me. Or not. Sometimes it takes a day or so for it to grow on me too. Regardless, I wanted to participate in this challenge and was pretty stressed with having it finished before the sun set. What’s great about the free printable is that I can do it again at a later time. :)
Updated card:
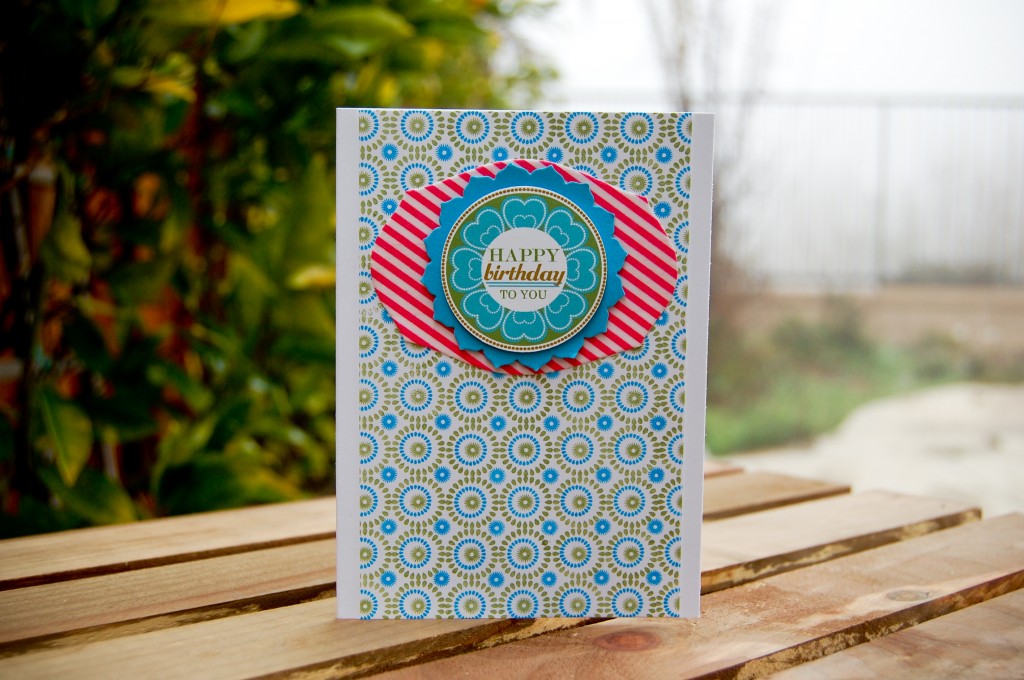
Ahh…much better, huh? I guess I just needed to step away from it for a bit. That and work when the kids are (finally!) asleep. LOL
(Note: Card base = 4″ x 5.5″)
Thanks for stopping by!
~Cynthia
Supplies: Paper: Printable printed on Neenah Royal Sundance Cover (brilliant white, 80#), Card base is Lynx Digital Paper (white, 100#), The Paper Company (Teal) Stamps: Background Borders: Medallions (PTI) Ink: Bamboo Leaves (Momento), Bahama Blue (Momento) Other: Mat Stack 1 Die (PTI), Limitless Layers 1-3/4″ Die (PTI), Washi Tape (Target)This week’s challenge for PTI’s Make It Monday #102 is stamping on an assembled shape, like a box or a bag. I chose to work with a pillow box. I have made many pillow boxes before and use them for packaging these pendants I make. In the past, I have only stamped or embossed on the box, no embellishments whatsoever. So, my pillow boxes have been kinda plain. I have thought about dressing it up a little bit more and this challenge gives me the chance to finally focus on that!
One thing that bugs me about the pillow box is that the flaps pop up a little when they should (in my opinion) remain down when assembled. They don’t pop up much, but enough to annoy me. I could tie a ribbon around it to keep it closed, but I wanted something simpler than that. So, I decided to use washi tape. What’s simpler than tape?! Pretty ones, too! lol These are the pillow boxes I came up with:
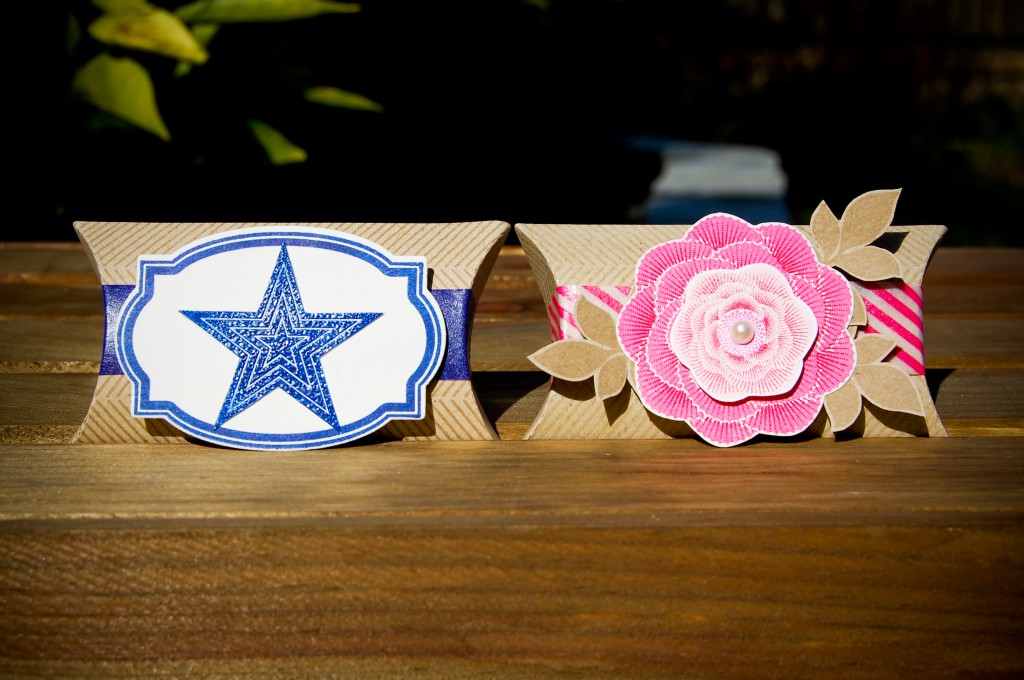
What I did: I used my Sizzix pillow box die to cut out the boxes in kraft cardstock. I stamped them both in a herringbone pattern- the star pillow box in a kraft colored ink and the flower pillowbox in VersaMark ink and then heat embossed with clear embossing powder.
After the pillow boxes were assembled, I wrapped the washi tape around the box, starting from the front and ending on the front. The focal elements will be adhered on top and will hide the ends of the tape.
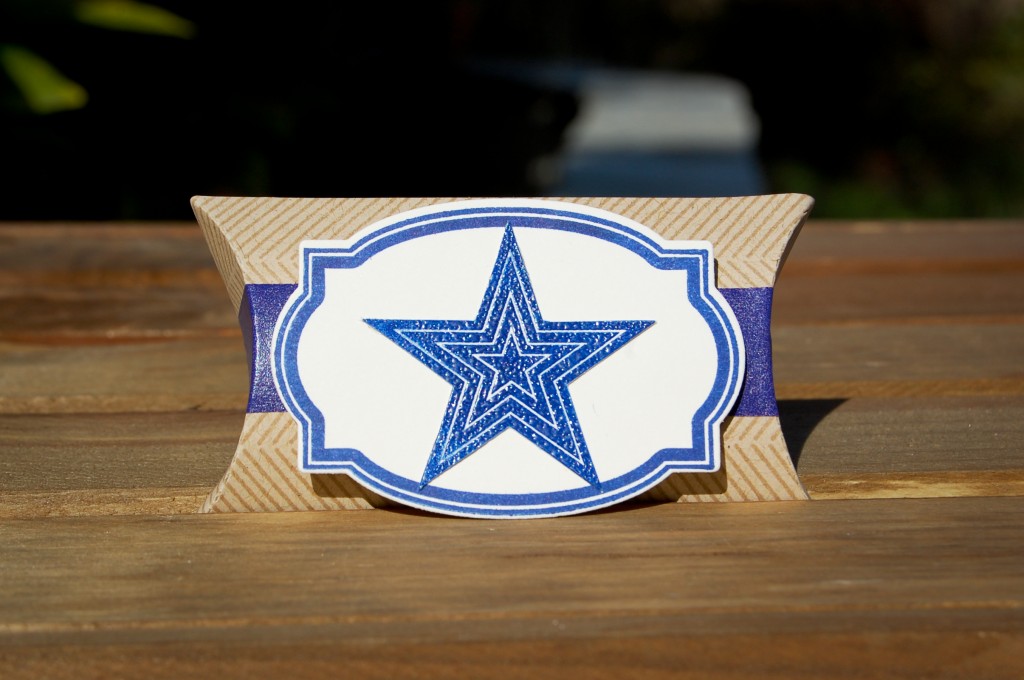
For the star pillow box, I stamped a star from Star Prints in a blue ink and heat embossed in clear embossing powder, cut it out, then glued it onto a fillable frame stamped with its coordinating image in the same color as the star. The whole thing is adhered on top of the pillow box with foam tape.
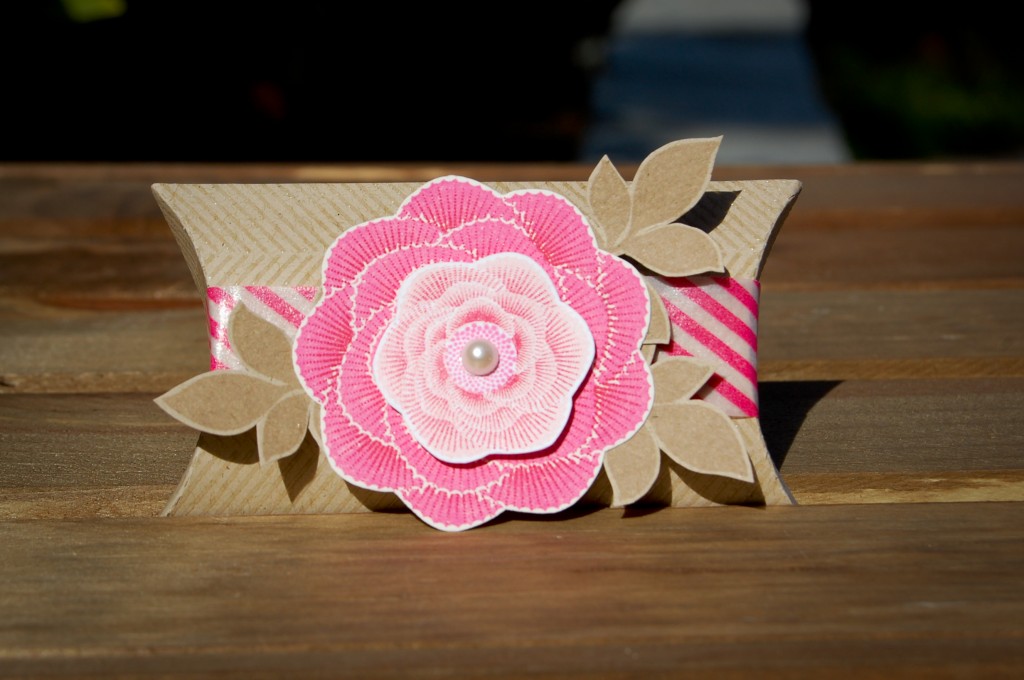
For the flower pillow box, I stamped the flowers and leaves from the Natural Beauties set. I adhered the smaller flower on top of the larger flower with foam tape. I finished off the flower element with a little pearl in the center. The flower element is adhered on top of the pillow box with foam tape as well.
I decided to exclude sentiments because first, I don’t know what occasion I will be using these boxes for yet and doing so will give me that flexibility. Also, I will most likely give the recipient a card along with the gift so having a sentiment on the gift as well is nice but wouldn’t be necessary.
Here are some photos of the individual pillow boxes I made:
I really like using the washi tape…it’s functional and fun! lol
Thanks for stopping by!
~Cynthia
Supplies: Paper: Mowhawk VIA Vellum (kraft, 80#), Cougar Digital Paper (natural, 80#) Stamps: Star Prints (PTI), Fillable Frames #10 (PTI), Natural Beauties (PTI), Interlocking Backdrops (lawn fawn) Ink: Star Pillow Box: Toffee Crunch (Momento), Majestic Blue (VersaFine) Flower Pillow Box: Rosebud (Momento), Rocket Red (Brilliance), Pixie Dust (VersaMagic), Toffee Crunch (Momento), VersaMark Other: Pillow Box Die (Sizzix), Fillable Frames #10 Die (PTI), Clear Embossing Powder (Zing!/American Crafts), Washi Tape (Target), Pearl (Recollections/Michaels)MIM #101: Layered Embossing…#2
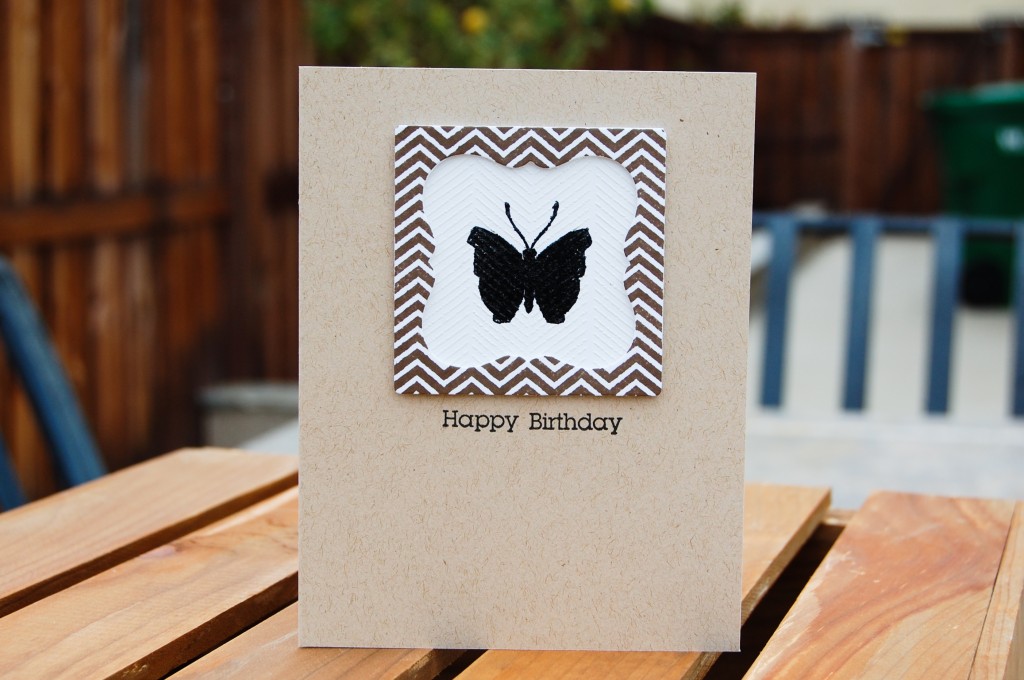
Hey there! So, I wasn’t planning on making another card for this challenge mainly because it was so messy working with the embossing powders and the technique was a bit challenging for me. But, there I was, sitting at my desk last night, thinking about mimicry of all things! (I know, so nerdy of me) But, it inspired me to create this card:
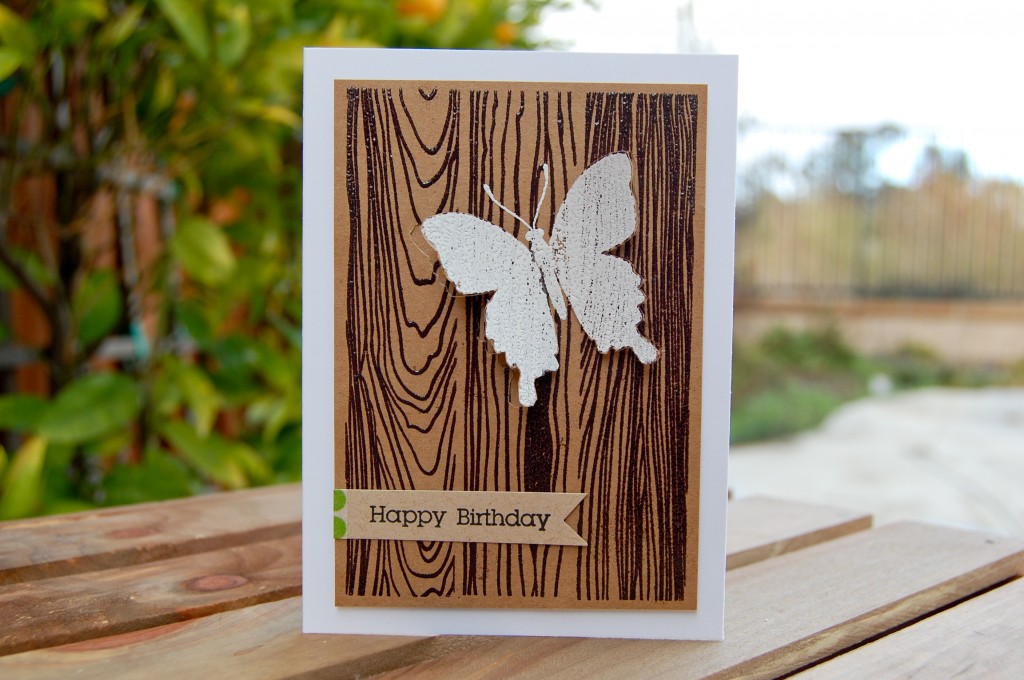
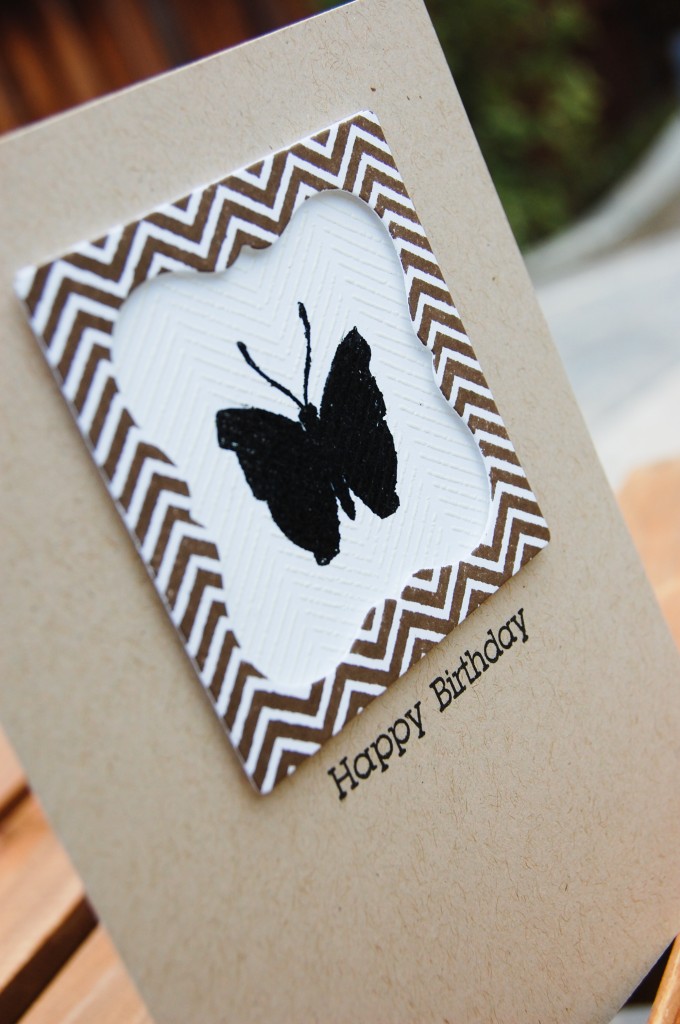
I used the woodgrain background stamp to create this panel. I wanted it to look like a part of a tree trunk so I stamped and embossed in brown onto kraft cardstock. Then I stamped and embossed the butterfly in white onto the “tree” (this is where the mimicry part comes in). I wanted the butterfly to look like it’s resting on the “tree” but still wanted some dimension to it, so with a craft knife, I cut out the outline of the butterfly wings and popped it up a bit. Here’s a better look:
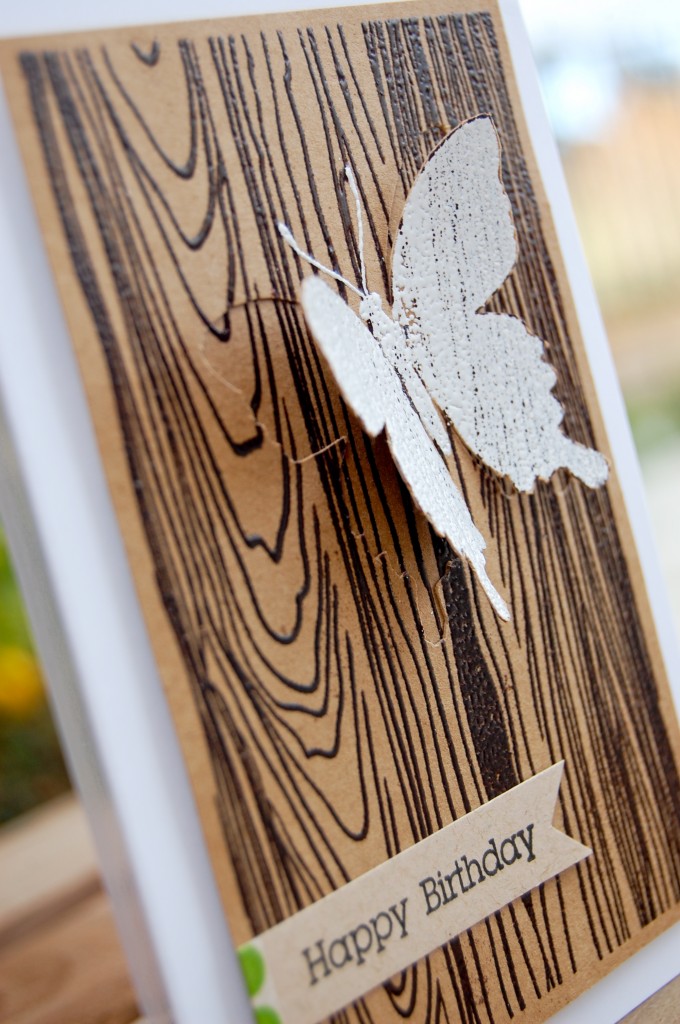
I also embossed another panel with the woodgrain pattern and adhered it underneath the butterfly panel, matching the pattern on top. This way, from the side, you don’t see the card base underneath. Plus, I thought it would add to the realistic feel I was going for. I didn’t want the sentiment to take away from the card so I just kept it simple.
Thanks for stopping by!
~Cynthia
(Note: Card size = 4″ x 5.5″)
Supplies: Paper: Lynx Digital Paper (white, 100#), Paper Studio (kraft), Mowhawk VIA Vellum (kraft, 80#), Stamps: Beautiful Butterflies (PTI), Background Basics: Woodgrain (PTI), Borders and Sentiments (Avocado Arts) Ink: Jumbo Java (VersaMagic), Frost White (Colorbox), Onyx Black (VersaFine), VersaMark Other: White Embossing Powder (Zing!/American Crafts), Clear Bark Embossing Powder (Recollections/Michaels), Washi Tape (Target)PTI’s January 2013 Blog Hop…Card #3
ETA (01/27/2013): A much better photo of this card~
Here is another card I made for the Blog Hop:
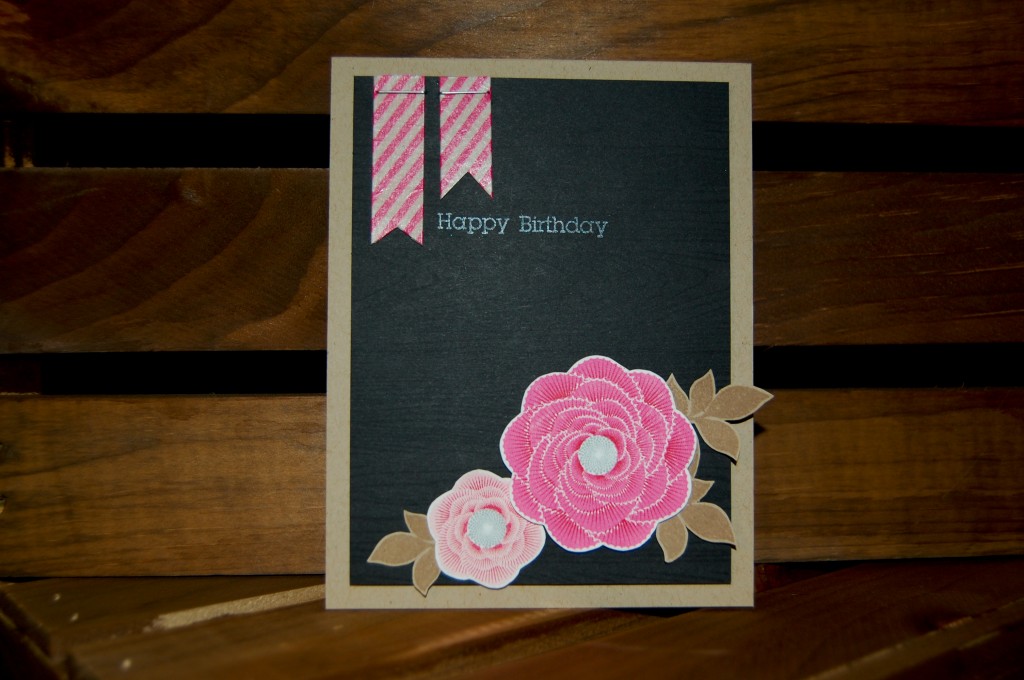
First, let me apologize for the photo quality. It was raining today and I had to take my photos indoors under very poor lighting conditions. This photo doesn’t do the card justice. This card is so much prettier in person.
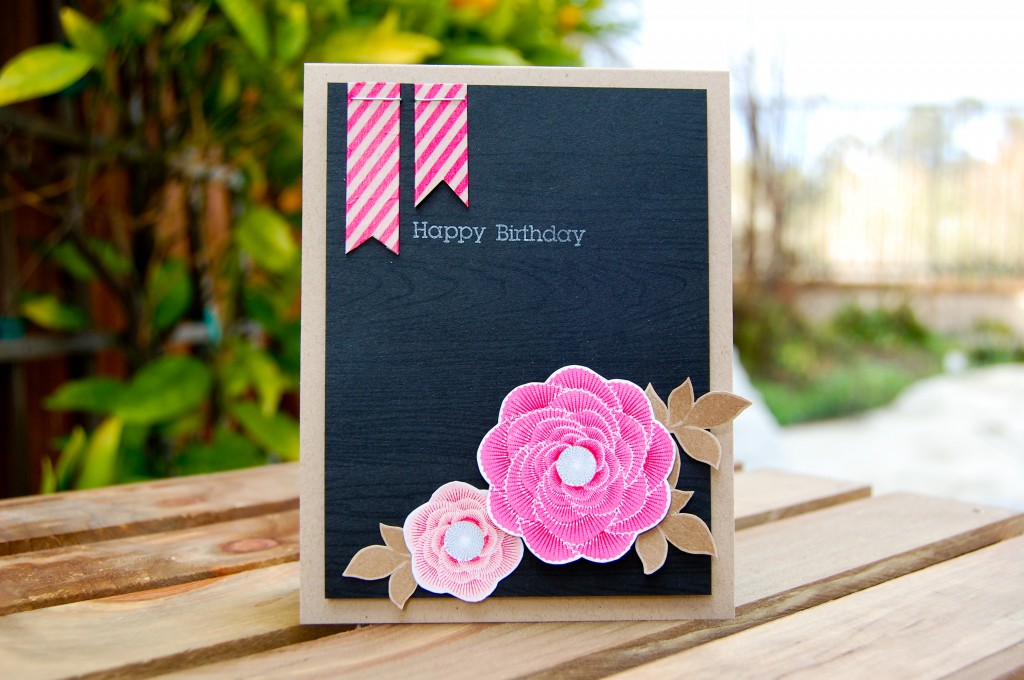
What I did: I stamped the background with the woodgrain pattern in VersaMark ink. What inspired this background pattern was the very table I craft on! It looks just like my table! Inspiration is definitely all around! :) I stamped the small flower in Pixie Dust then the details in Rocket Red. The larger flower is stamped in Rosebud and the details were also stamped in Rocket Red. The centers to both flowers were stamped in London Fog (it’s probably hard to see). The leaves were stamped on kraft cardstock in VersaMark ink. The flower & leaf elements were all fussy cut. The large flower is mounted on with foam tape. The flags were originally going to be just kraft cardstock. But, I felt it needed something more and I decided to cover them in washi tape and then stapled them to the panel. I’m really glad I did that. I think it gave the card a little more balance. The panel was then adhered to the card base with foam tape.
I’m really happy with how this card turned out. I enjoyed the creative process and I love how the colors just pop off the black background. It was definitely a fun card to make. :)
Thanks for stopping by!
~Cynthia
Supplies: Paper: Mowhawk VIA Vellum (kraft, 80#), Neenah Royal Sundance Cover (brilliant white, 80#) Stamps: Natural Beauties (PTI), Background Basics: Woodgrain (PTI), Borders and Sentiments (Avocado Arts) Ink: Pixie Dust (VersaMagic), Rocket Red (Brilliance), Rosebud (Momento), London Fog (Momento), Ultimate Metallic Blue (Encore!), VersaMark Ink Other: Washi Tape (Target), StaplesPTI’s January 2013 Blog Hop…Card #2
This is the second card I made for PTI’s January 2013 Blog Hop:
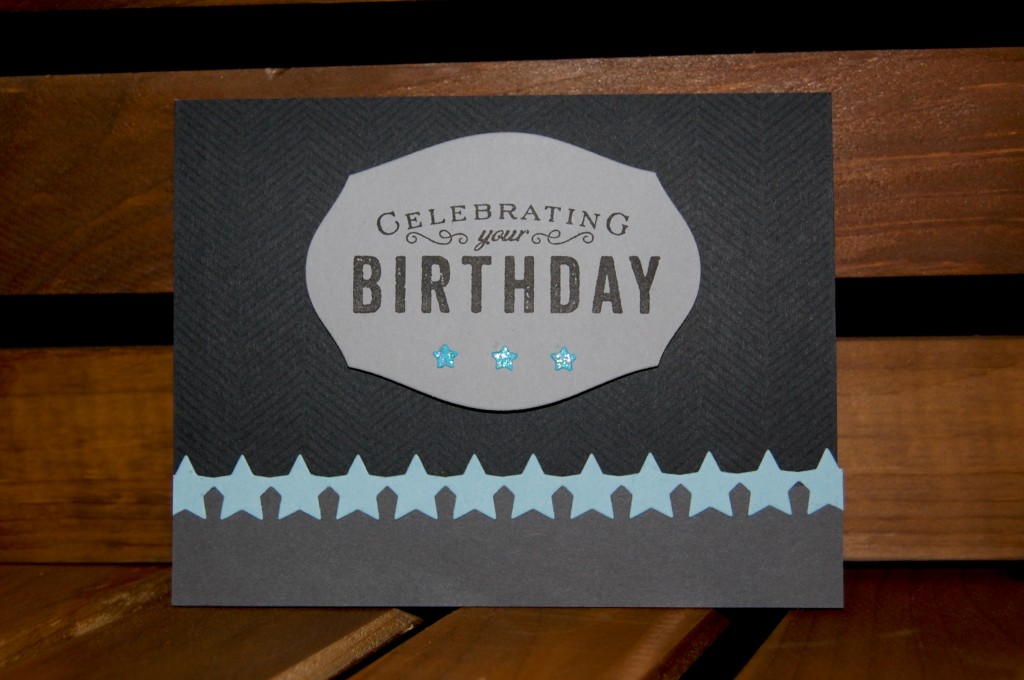
This card came together rather quickly…unusual for me. I’m such a slow crafter. I think it came together fast because I knew I wanted to make a masculine card. The black background challenge lends to it nicely, I thought. Then it wasn’t difficult choosing “masculine” elements (read: I don’t have many to choose from! lol).
What I did: I stamped the herringbone pattern in VersaMark ink on the black paper and adhered it onto a kraft card base. Then adhered a strip of dark gray paper over it and the star border over that. I stamped the “Celebrating Your Birthday” sentiment in black ink onto a light gray Mat Stack 1. The little stars are from the star border die as well. I dabbed some glitter Stickles onto those to make it sparkle a little bit.
Thanks for stopping by!
~Cynthia
Supplies: Paper: Mowhawk VIA Vellum (kraft, 80#), The Paper Company Stamps: Movers & Shakers Sentiments (PTI), Interlocking Backdrops (lawn fawn) Ink: Onyx Black (VersaFine), VersaMark InkOther: Mat Stack 1 Die (PTI), Star Border Die (PTI), Star Dust Stickles
PTI’s January 2013 Blog Hop
This month’s Blog Hop theme over at Nichole Heady’s blog is black backgrounds. I made this card last week for the MIM #100 challenge and I loved how it turned out. In thinking about what to create for the blog hop, I kept thinking about this card and wondering how it would look with a black background. Wonder no more…this is how it turned out:
I love this card too. It’s crazy what a difference a mere change in background color makes!
Here is the other card for comparison:
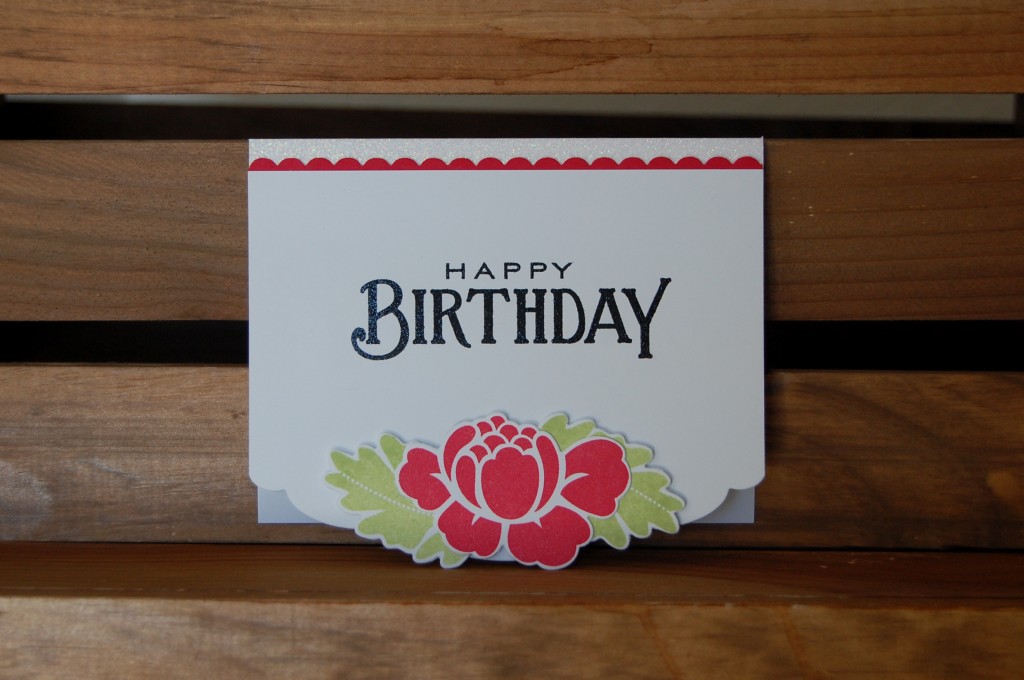
This was a fun and neat little experiment. Love both looks!
Thanks for stopping by!
~Cynthia
Supplies: Paper: Lynx Digital Paper (white, 100#), The Paper Company Stamps: Rosie Posie (PTI), Think Big Favorites #12 (PTI) Ink: Rocket Red (Brilliance), Bamboo Leaves (Momento), Frost White (Colorbox), VersaMark InkOther: Rosie Posie Dies (PTI), Edgers #3 Die (PTI), Heart Border Die (PTI), White Embossing Powder (Zing!/American Crafts)
MIM #101: Layered Embossing
This week’s Make It Monday Challenge is to layer one color of heat embossing powder over another. I’ve always wondered if this was possible or if it should even be attempted. I thought the embossing powder would get over heated. And, I imagined it would be difficult to get a clean and crisp image over the embossing. I was right…this was not an easy technique for OCD crafters like me. LOL! It took a couple of attempts but I finally ended up with something I’m fairly satisfied with.
What I did: I embossed the herringbone background pattern with white embossing powder onto white paper. Then I stamped the butterfly in black ink (inking first with VersaMark then the black worked the best) and embossed with black embossing powder with glitter finish. I really like how the background pattern peaks through the butterfly. But, it was hard to keep the stray black embossing powder grains from going every which way. They seemed to have a mind of its own! Here is a close up of the embossing:
I finished the card by framing the butterfly with one of the Fabulous Frames with foam tape and stamping a simple sentiment underneath.
Thanks for stopping by!
~Cynthia
Supplies: Paper: Mowhawk VIA Vellum (kraft, 80#), Neenah Royal Sundance Cover (brilliant white, 80#), Lynx Digital Paper (white, 100#) Stamps: Beautiful Butterflies (PTI), Fabulous Frames (PTI), Interlocking Backdrops (lawn fawn), Borders and Sentiments (Avocado Arts) Ink: Walnut Stain (Tim Holtz Distress Ink/Ranger), Onyx Black (VersaFine), VersaMark Other: Fabulous Frames Dies (PTI), White Embossing Powder (Zing!/American Crafts), Black Embossing Powder with Glitter Finish (Zing!/American Crafts)Phew! I think this is it. My last MIM #100 Challenge entry. It was lots of fun and I discovered how much I enjoy creating matching packaging with my cards!
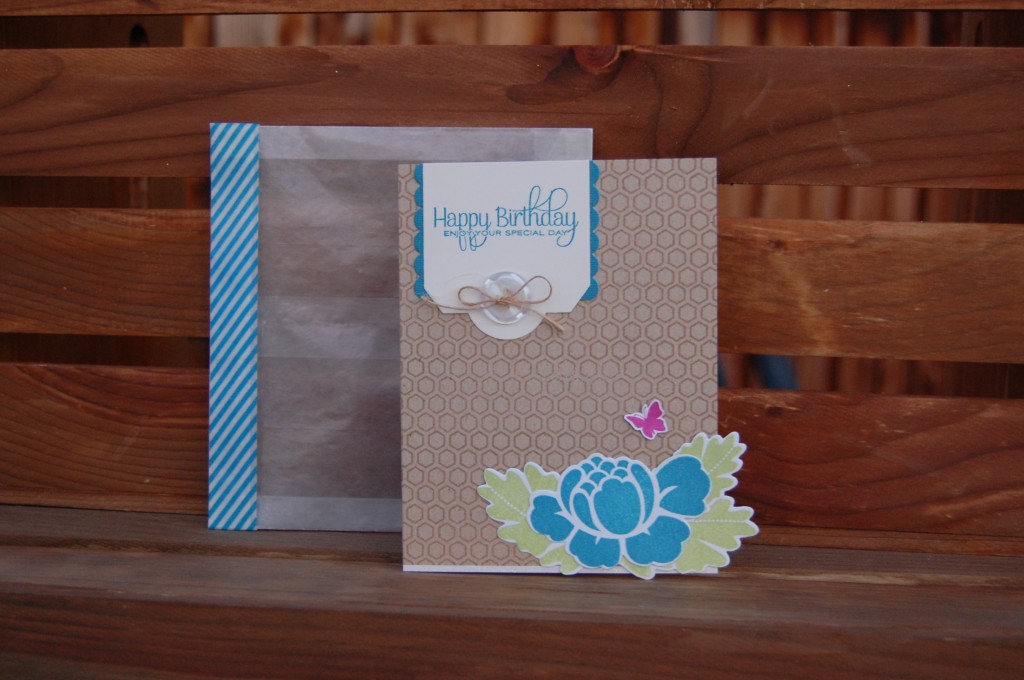
I really liked how the tag on the package looked in my previous card + envelope set (see here) so I wanted to incorporate it onto a card. This is what I came up with:

I used a glassine bag again and this time I folded it down a couple of times and sealed it with a long strip of washi tape. I love how pretty it looks! The washi tape goes so well with the glassine bag! Here is a pic of the card outside of the bag:
Thanks again for stopping by!
~Cynthia
Supplies: Paper: Mowhawk VIA Vellum (kraft, 80#), Cougar Digital Paper (natural, 80#), Lynx Digital Paper (white, 100#) Stamps: Rosie Posie (PTI), Natural Beauties (PTI), Beautiful Butterflies (PTI), Interlocking Backdrops (lawn fawn) Ink: Lilac Posies (Momento), Teal Zeal (Momento), Toffee Crunch (Momento), Broken China (Tim Holtz Distress Ink/Ranger), Stick Candy (Jenni Bowlin/Ranger) Other: Tag Sale #6 (PTI), Rosie Posie Dies (PTI), Heart Border Die (PTI), Glassine Bag, Glitter Tape (Recollections/Michaels), Button, Natural Twine, Washi Tape (Target)Here’s another one for the MIM #100 Challenge… I think it’s my favorite of the bunch. I just love how everything turned out.
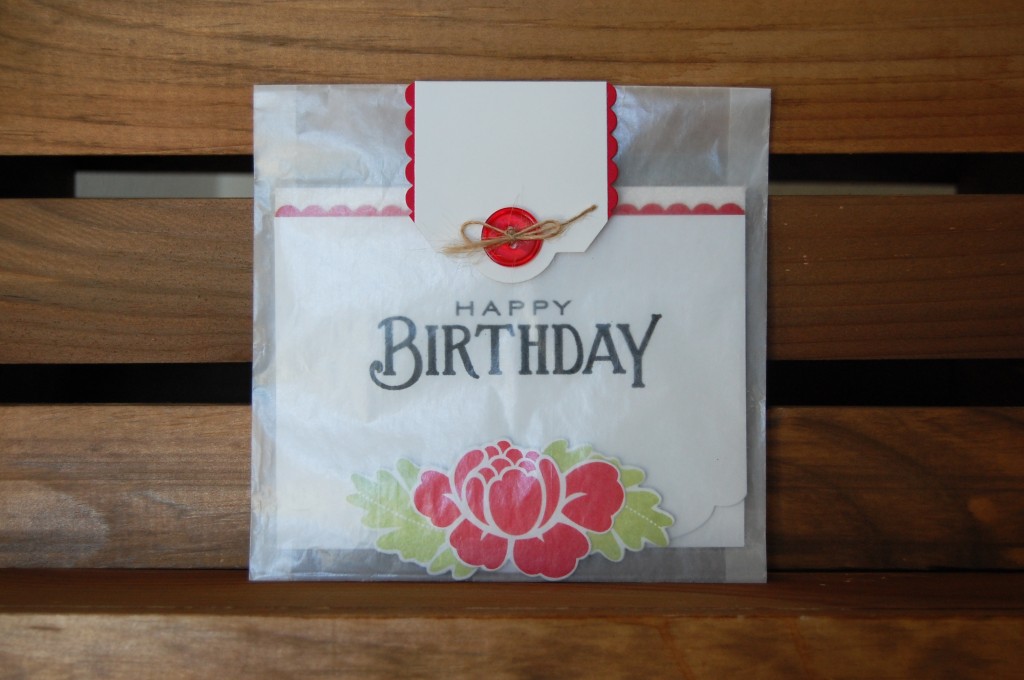
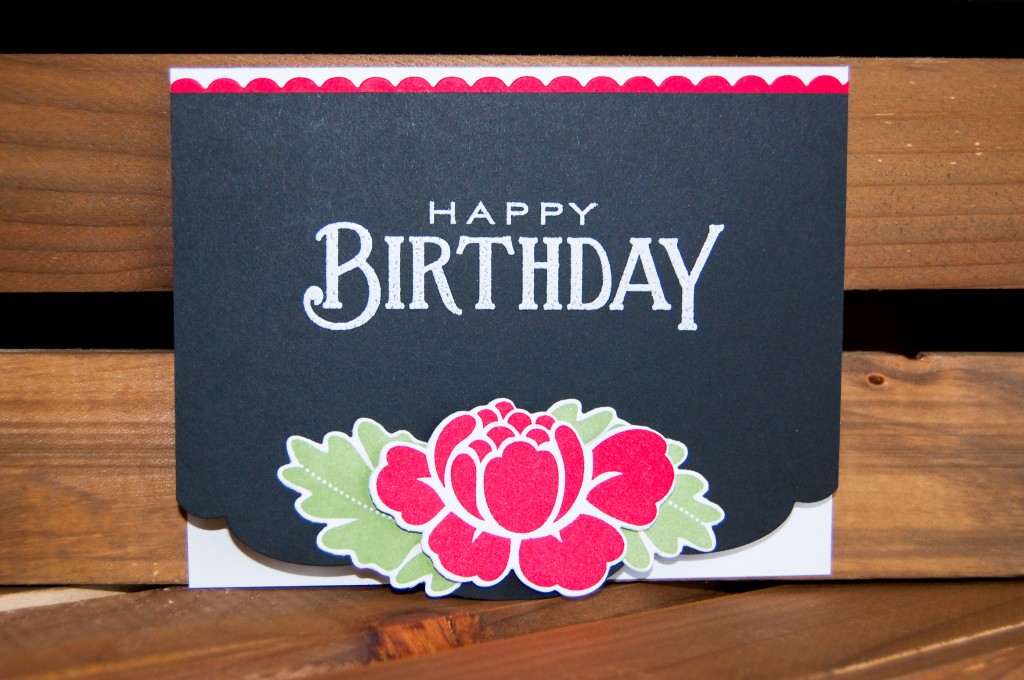
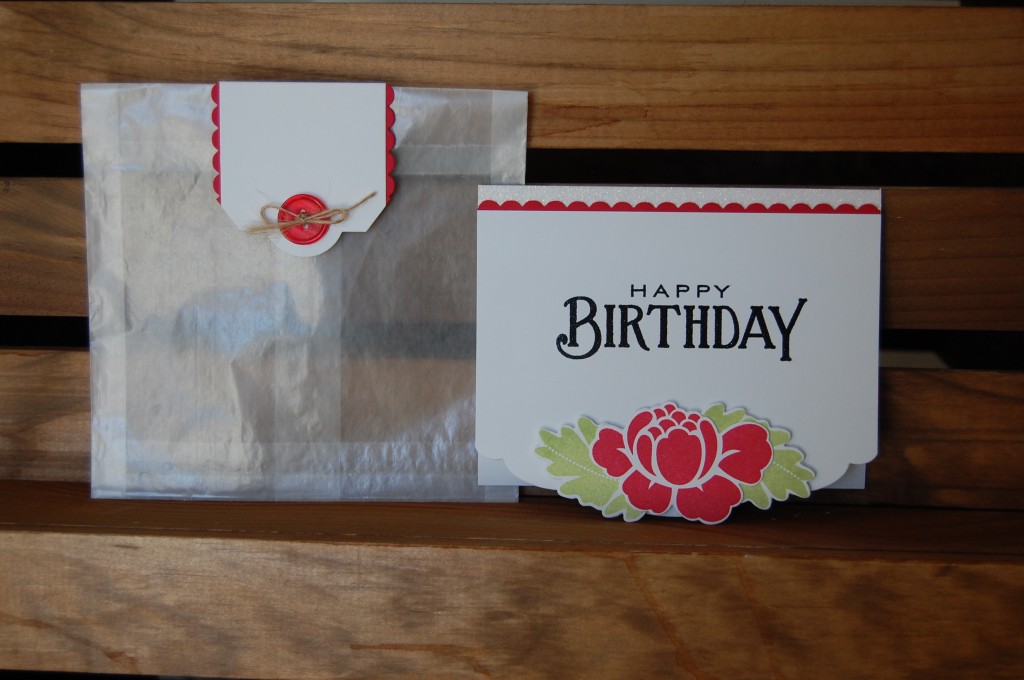
For the card, I started with a standard A2 card base and die cut a panel with the Edgers #3 Die. I wanted more length to the card because I wanted to use the super sized “Happy Birthday” sentiment and felt if I left it at standard size it would feel too squished. By doing so it left me with a little room to embellish the top. I used some glitter tape (how fun!) along the top. Over that I adhered the hearts border and then the “Happy Birthday” panel on top of that, leaving a scalloped edging on top. Before adhering the panel though, I trimmed off just enough from the front of the card base so the edging will be open. (When the card is closed what you see is the back of the card base.) I embossed the “Happy Birthday” in black glitter finish, just to add a little subtle bling. Then at the bottom I adhered, using foam tape, a red Rosie Posie flower and leaves. Here is a pic of the card only:
For the packaging, I used a glassine bag again. I folded over the top of the bag and taped it down with a little bit of red polka dot washi tape (which you can’t see because the tag goes over it on the back, but when the recipient opens up the package, it will be a fun little surprise! Wait, I take it back, the only part of the washi tape that peaks through the hole of the tag is one red dot. It fit so perfectly that I just had to line it up that way!). I added a scallop trim along the side edges of the tag (only on the front of the tag, it does not extend to the back). And then I finished it with a simple red button tied with natural twine. The tag is just taped onto the bag with double-sided tape. I thought about decorating the tag a little more, but decided to leave it alone. I like how clean and simple it looks and how the packaging becomes one with the card. Here is a final pic of the card outside the package:
Thanks for stopping by!
~Cynthia
Supplies: Paper: Lynx Digital Paper (white, 100#), Neenah Royal Sundance Cover (brilliant white, 80#), The Paper Company Stamps: Rosie Posie (PTI), Think Big Favorites #12 (PTI) Ink: Rocket Red (Brilliance), Stick Candy (Jenni Bowlin/Ranger), Onyx Black (VersaFine) Other: Rosie Posie Dies (PTI), Edgers #3 Die (PTI), Tag Sale #6 Die (PTI), Heart Border Die (PTI), Black Embossing Powder with Glitter Finish (Zing!/American Crafts), Glitter Tape (Recollections/Michaels), Button, Natural Twine, Washi Tape (Target)Told ya to expect at least another ;)
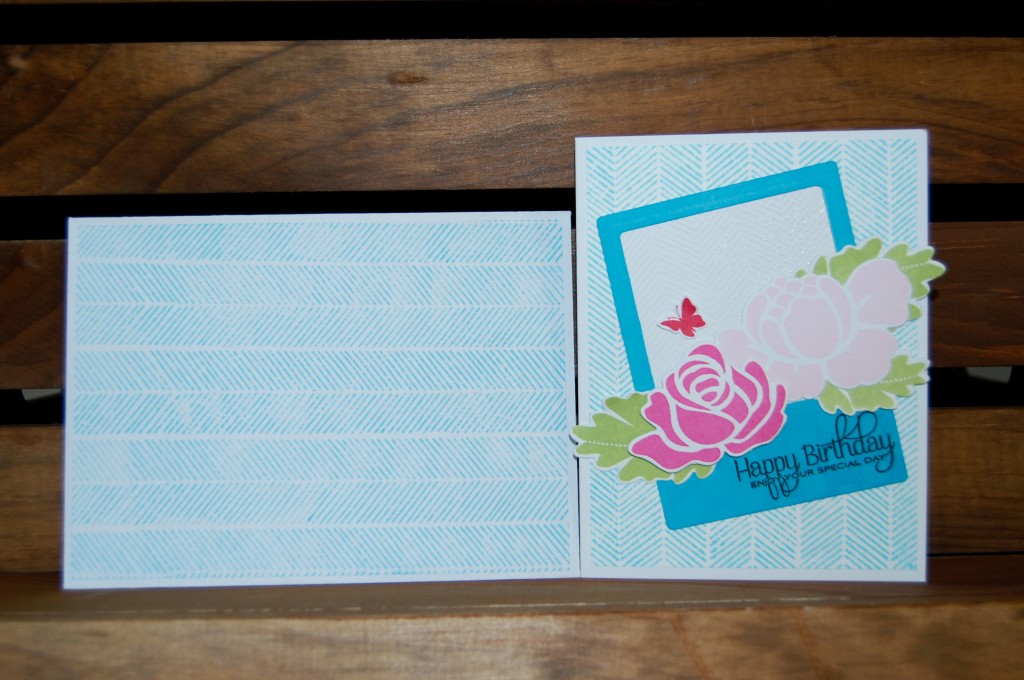
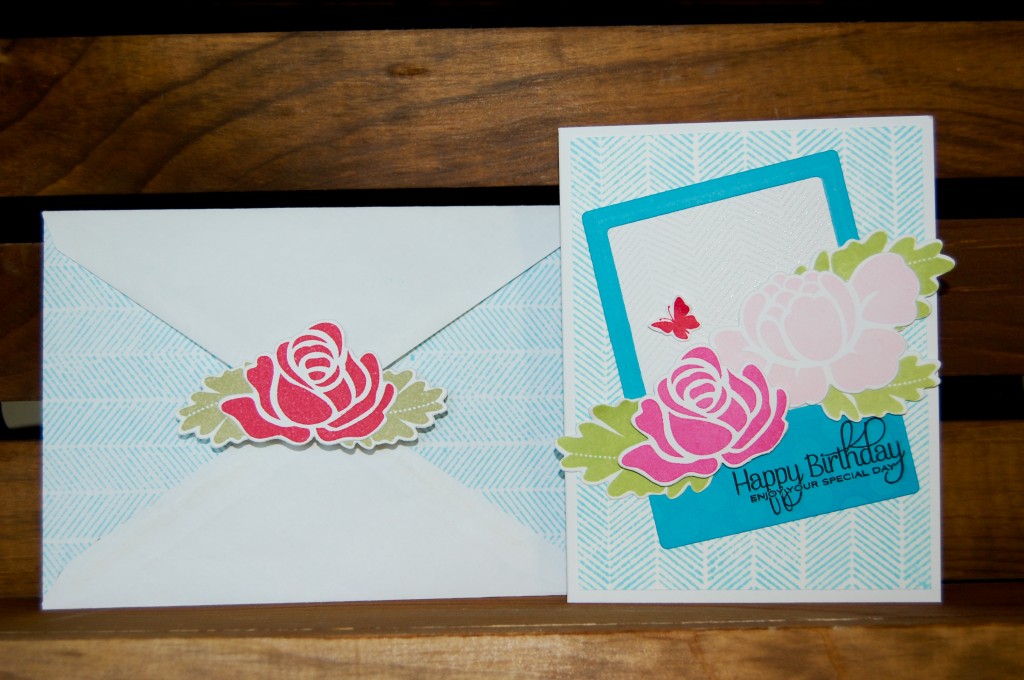
Okay, so I made a similar card earlier. I need another birthday card this month and liked the other layout so much that I decided to duplicate it. I like giving unique cards so I changed out the colors of the flowers and butterfly and the background of the frame to suit the recipient. I really loved the herringbone pattern so I kept it the same. Since this oversized card would also need an envelope, I decided to submit it to this challenge as well (hope that’s okay). I changed up the envelope a little by completely covering the front with the herringbone pattern instead of keeping it simple like before. I was afraid to do this with the other envelope, but am so glad I did it with this one. I love how it looks. I actually stamped the pattern on a plain sheet of white photocopy paper and trimmed it slightly smaller than the envelope and adhered it to the envelope really well. I like having the white frame around the pattern…just like on the card.
Thanks again for stopping by!