MIM #101: Layered Embossing
This week’s Make It Monday Challenge is to layer one color of heat embossing powder over another. I’ve always wondered if this was possible or if it should even be attempted. I thought the embossing powder would get over heated. And, I imagined it would be difficult to get a clean and crisp image over the embossing. I was right…this was not an easy technique for OCD crafters like me. LOL! It took a couple of attempts but I finally ended up with something I’m fairly satisfied with.
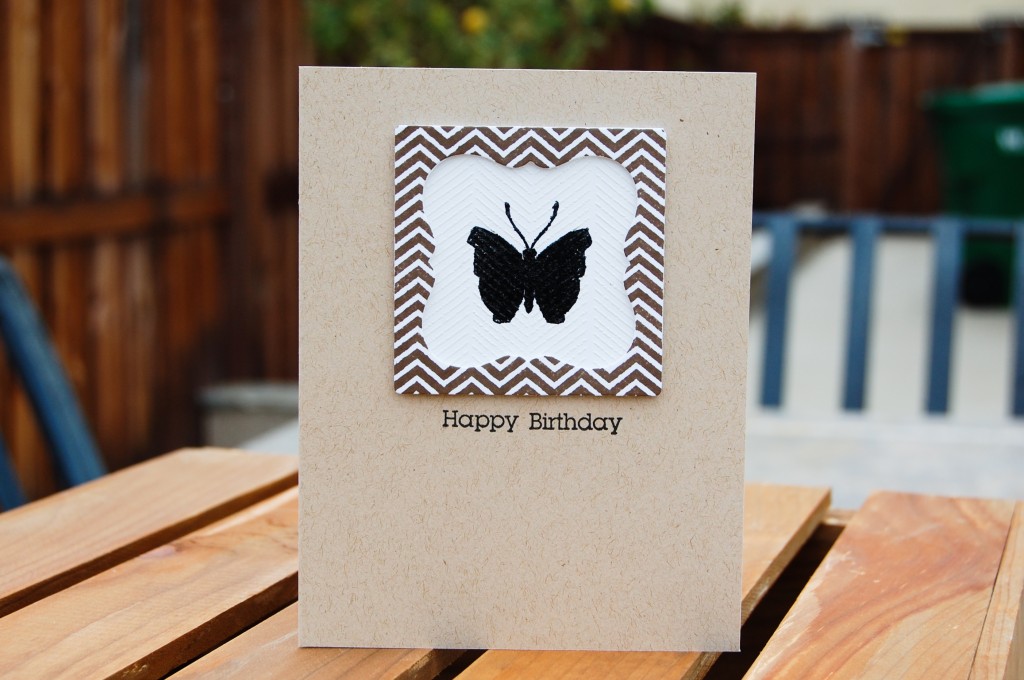
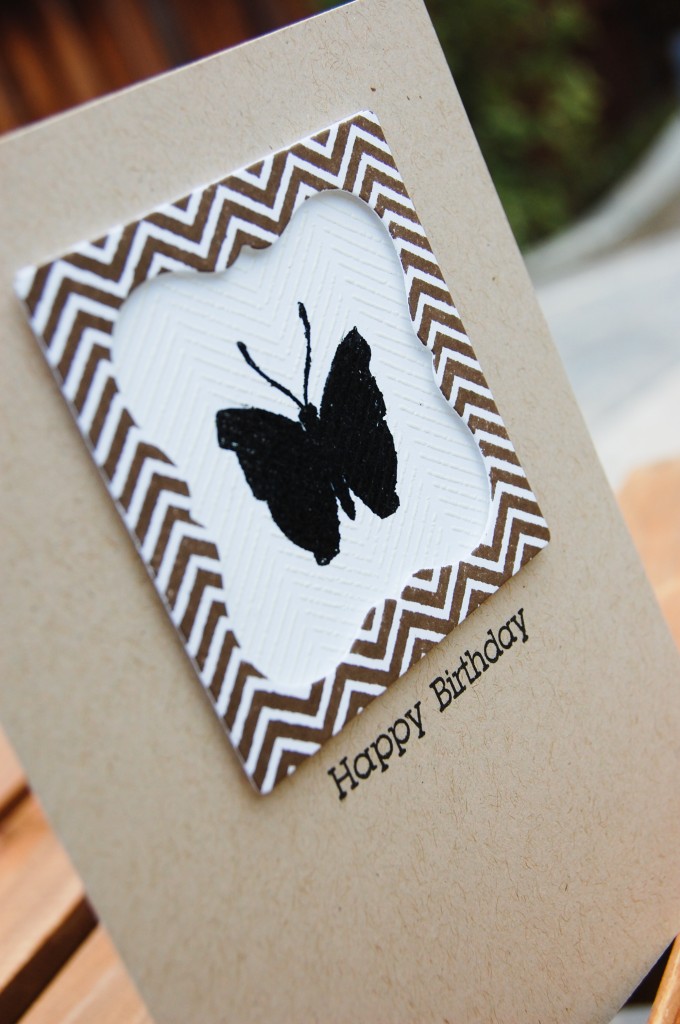
What I did: I embossed the herringbone background pattern with white embossing powder onto white paper. Then I stamped the butterfly in black ink (inking first with VersaMark then the black worked the best) and embossed with black embossing powder with glitter finish. I really like how the background pattern peaks through the butterfly. But, it was hard to keep the stray black embossing powder grains from going every which way. They seemed to have a mind of its own! Here is a close up of the embossing:
I finished the card by framing the butterfly with one of the Fabulous Frames with foam tape and stamping a simple sentiment underneath.
Thanks for stopping by!
~Cynthia
Supplies: Paper: Mowhawk VIA Vellum (kraft, 80#), Neenah Royal Sundance Cover (brilliant white, 80#), Lynx Digital Paper (white, 100#) Stamps: Beautiful Butterflies (PTI), Fabulous Frames (PTI), Interlocking Backdrops (lawn fawn), Borders and Sentiments (Avocado Arts) Ink: Walnut Stain (Tim Holtz Distress Ink/Ranger), Onyx Black (VersaFine), VersaMark Other: Fabulous Frames Dies (PTI), White Embossing Powder (Zing!/American Crafts), Black Embossing Powder with Glitter Finish (Zing!/American Crafts)Comments are closed.
I agree, wasn’t an easy task, but your card and it’s butterfly is gorgeous. Love that white background!
Great card!
Terri E.
Cool! I really like the look of embossed herringbone.