MIM #48: Creating Backgrounds with Border Dies
The challenge this week at Papertrey Ink’s Make It Monday Challenge #48 is to create a background with border dies. I used PTI’s Rickrack Border Die to create the background and this is what I came up with:
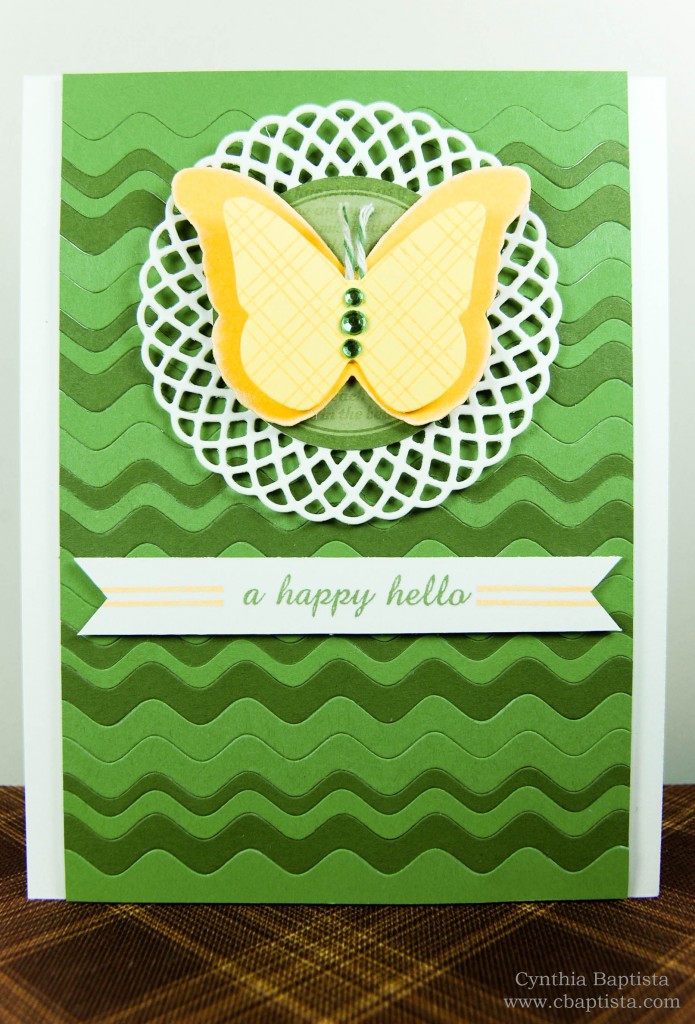
To create the background, I die cut the rickrack border in two shades of green. As I cut, I created thinner borders by nesting the die right under the previous cut. After I had my strips, I started to piece them together like a puzzle by adhering onto a lightweight piece of cardstock. The pattern was 2 light green, 1 dark green, 1 thin light green, 1 thin dark green, and repeat. It was pretty fun piecing them together. The hardest part was probably deciding on the color scheme and pattern. But, once I had that figured out everything went together nicely.
After the background was done, I trimmed off the excess paper and then adhered it onto the card front. I then layered on the other elements to create this finished card. This technique is a great alternative to stamping out a background. It’s one I’m sure I’ll turn to often in the future!
Thanks for stopping by!
~Cynthia
Supplies:Paper: Lynx Digital Paper (100#), The Paper Company
Stamps: Background Basics: Text Style II, Faux Ribbon, Label Basics, Sending You, Martha Stewart Background Pattern Stamps Ink: Bamboo Leaves (Momento), Canteloupe (Momento), Moonlight White (Brilliance)
Dies: Rickrack Border, Doily Details, Limitless Layer: 1 3/4″ Circle Collection, Butterfly, Signature Series: Butterfly Other: Baker’s Twine (Martha Stewart), Green Rhinestones (Michael’s)
Comments are closed.
Great use of the ric rac die. So vibrant.