Post #2!

Hey there! I’m happy to bring you post #2! I’m still getting used to this blogging thing, but I think I’ve decided on a theme that I’m happy with. That’s a start, right?
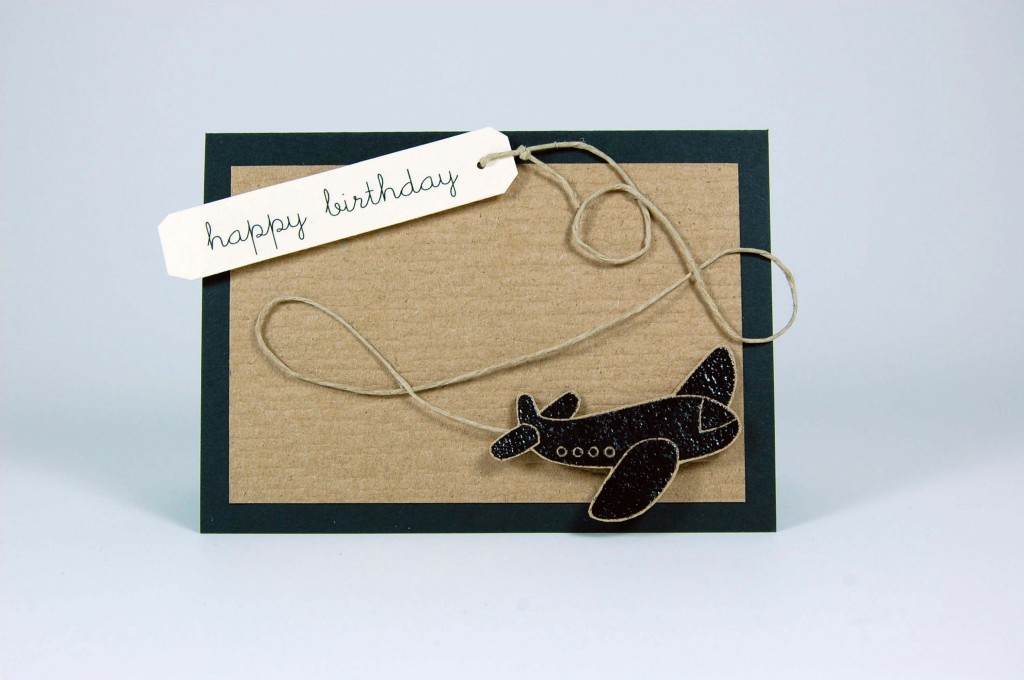
I recently made a mini birthday card for my son. This card was inspired by one Nichole Heady made. I really liked how she incorporated the twine as the flight path and wanted to do the same with my card. Instead of a standard A2 size card though, I decided to make a mini card. That was my intention anyhow. It ended up being a tag because I didn’t have an envelope that fit the mini card and it was getting late and I was getting really tired so, voilà, a tag was born! haha
Here are the details:
The card measures 3 x 4-1/8 in. The mat layer measures 2-1/2 x 3-5/8in and was dry embossed with a distressed texture plate. I love how that looks!
The airplane was stamped in black pigment ink and heat embossed in black embossing powder and then I hand cut that little guy out. I love how the black embossing makes the airplane pop! I initially used clear embossing powder with the black pigment ink and it looked good too, but the black really makes the airplane stand out even more. Love it!
I printed the sentiment off my computer and trimmed it down and handcut the corners to make it look a bit more like a banner the airplane would be pulling. A 1/8-in hole was punched in the banner and the twine was secured.
I had the hardest time with the twine! The twine comes out of a ball so it’s a bit curly. In retrospect, I probably should have tried to straighten it out a little before using it. That might have helped. Oh well… Anyway, I anchored down one end of the twine by securing the banner with foam stickies to the card and then worked the loops with the twine. The twine is glued down only at the points where the loop meets. I tried keeping the twine in place using glue dots and red-line tape but I didn’t like how that looked. No matter how teeny tiny I cut the adhesive or how carefully I placed it along the twine, I could still see it sticking out. I had some Glossy Accents I used for a different project and gave that a try. It was perfect! It bonds very quickly and didn’t leave any residue on the card. I actually didn’t think to use the Glossy Accents until the following morning. I kept trying all night to get it just right with the different adhesives I had. It was so frustrating! Apparently, all I needed was a little bit of sleep for the answer to come to me- go figure! LOL I finished the card off by sandwiching the end of the twine between the airplane and some foam stickies and then glued it down. The inside of the card is finished with kraft cardstock, so it matches the mat layer.
I turned it into a tag by punching a hole in the back of the card (so it wouldn’t ruin the front) and tied more twine through the hole. Now, I had a cute little tag for my son’s gift!
The photo above is of the mini card, before it became a tag. I didn’t decide to turn it into a tag until I was completely finished with the card and realized my envelope dilemma. By that time, I had already taken the photo and bed was calling me.
So, what do you think? I thought my little one would “ooh” and “ahh” over the plane, like he normally does over airplanes. But, I think he was too distracted with his gifts to even notice the card! The next day, he did notice the little cast-off airplanes on my desk and wanted to play with them. Priorities, right? haha
Have a good one!
~Cynthia
Airplane Birthday Mini Card Ingredients:
Paper: The Paper Company
Stamps: TPC Studio Clear Stamps
Ink: Studio G Chalks Pigment Ink (Black)
Accessories: All Night Media Embossing Powder (Black Detail), Hemp Twine, Ranger Glossy Accents, Cuttlebug, Sizzix Texturz Texture Plate (Distressed), Computer Generated Sentiment
Comments are closed.